How To Know If CloudFlare Is Working

  1. Login to your Cloudflare console
  2. Click the gear on the url and set “Page Rules”
  3. Check “Forwarding”
  4. Url Patern: http://yoursite.com/cloudflare
  5. Destination: http://yoursite.com/ison
  6. Add Rule and wait a few minutes.
  7. Go to your url, and you should be redirected to your “ison” url.


New Domain: dan.folkes.me

I went ahead and took the plunge! Our family has a new domain!

I purchased folkes.me and setup subdomains for:
dan.folkes.me and micaela.folkes.me.

If you go to folkes.me, I just made a pretty lame looking landing page.

I debated doing danfolk.es, but I wanted micaela and all of our other children and animals to have the ability to have subdomains. So, I look forward to making a fat cat homepage at pyro.folkes.me.

😀

I setup a free account with CloudFlair too! It should increase speed and reduce server load. I need this because all of this is hosted on a free hosting account at Freehostia (I love Freehostia).

Get a Server’s IP that is Always Changing

So, my server at home’s IP address is always changing. Sometimes it’s sitting there broadcasting my development server’s website to the world on an IP that I don’t know.

So, when this happens, I have to go get physical access and bring up canyouseeme.org or something like it.

There are a few solutions to this problem:

  • DynDNS – A good solution, but I hate that they will cancel your service when you don’t login.
  • Get a static IP from your ISP – Costs extra money
  • Somehow, get the server to broadcast it’s address to a static place

I went with the last option. You could do this in a multitude of ways. You could have your server send it’s address in an email to you periodically or on boot. You could FTP it to a free FTP server. You get the idea.

I did this:
* danfolkes.com : that keeps it’s IP. It has PHP.
* lab.danfolkes.com : that changes it’s IP.

I setup a cron job on lab.danfolkes.com to run every 8 hours and open a PHP page:

0 */8 * * * /usr/bin/curl "http://danfolkes.com/path/to/file.php"

The page on danfolkes.com will record the last 50 IPs sent to it in a logfile:

	// danfolkes.com/path/to/file.php:
	$file = 'log/file.txt';
	$max = 50;
	$content = "\n<br/>" . date("Y-m-d H:i:s") . " " . $_SERVER['REMOTE_ADDR'] . "";
 
	$filecontents = file_get_contents($file);
	$filecontents = $content . $filecontents;
	$filecontents = implode("\n<br/>", array_slice(explode("\n<br/>", $filecontents),0, $max));
	echo $filecontents;
 
	file_put_contents($file, $filecontents);

So, if my server’s IP ever changes, there will be a nice little record of the last known IPs. I can go into my DNS settings for lab.danfolkes.com and set them to the new IP.

<!-- Log File -->
<br/>2013-07-30 12:56:09 24.125.92.189
<br/>2013-07-30 04:56:10 24.125.92.189
<br/>2013-07-29 20:56:21 24.125.92.189
<br/>2013-07-29 20:56:19 24.125.92.189
<br/>2013-07-29 20:56:15 24.125.92.189
<br/>2013-07-29 20:56:12 24.125.92.189
<br/>2013-07-29 20:55:48 24.125.92.189
<br/>2013-07-29 20:55:32 24.125.92.189
<br/>2013-07-29 20:50:04 24.125.92.189
Installing Diaspora on Ubuntu on VirtualBox

Installing Diaspora on Ubuntu on VirtualBox

I wrote up a little howto on the Diaspora git hub:
https://github.com/diaspora/diaspora/wiki/Installing-Diaspora-on-Ubuntu-on-VirtualBox

Sending Email with PHP, Gmail or Google Apps, Mail, and PEAR on Ubuntu

First Install Pear, Mail, Mail Mime, Net SMTP. Restart Apache:

sudo apt-get install php-pear
sudo pear install mail
sudo pear install mail_mime
sudo pear install Net_SMTP
sudo /etc/init.d/apache2 restart

Here is the PHP code I used to send an email:

try {
	require_once "Mail.php";
 
	$from = "[email protected]";
	$to = "{$email}";
	$subject = "Hi!";
	$body = "Hi,\n\nHow are you?";
 
	$host = "ssl://smtp.gmail.com";
	$port = "465";
	$username = "[email protected]"; //This can also be a Google Apps account
	$password = "PASSWORD";
 
	$headers = array ('From' => $from,
	  'To' => $to,
	  'Subject' => $subject);
	$smtp = Mail::factory('smtp',
	  array ('host' => $host,
		'port' => $port,
		'auth' => true,
		'username' => $username,
		'password' => $password));
 
	$mail = $smtp->send($to, $headers, $body);
 
	if (PEAR::isError($mail)) {
	  echo("<p>" . $mail->getMessage() . "</p>");
	 } else {
	  echo("<p>Message successfully sent!</p>");
	 }
} catch (Exception $e) {
	echo 'Caught exception: ',  $e->getMessage(), "\n";
}

Minecraft – Script – Backup – Update Server – Restart

This is the script I use that will:

  • Automatically backup minecraft map
  • Automatically update minecraft server
  • Automatically restart the server if it stops or dies
#!/bin/bash
while [ true ]; do
   # make md5 of current file for update check.
   md5sum minecraft_server.jar > minecraft_server.jar.md5
   wget -o updatelog.log -N --trust-server-names http://www.minecraft.net/download/minecraft_server.jar
   # display updated status
   if md5sum -c --status minecraft_server.jar.md5 
   then
    echo "Server Up to Date."
   else
    echo "Updated Server!"
   fi
   java -Xmx1024M -Xms1024M -jar minecraft_server.jar nogui
   rsync -a --delete --progress /home/dan/serv/minecraft/world "/home/dan/serv/minecraft/bak/world"`eval date +%Y%m%d`""
done

Code Explained:

This will put the server in an infinite loop. You can kill it by hitting Control+C a couple times in a row.

while [ true ]; do

This will make a hash of the current minecraft_server.jar and then download the newest copy using wget.

md5sum minecraft_server.jar > minecraft_server.jar.md5
wget -o updatelog.log -N --trust-server-names http://www.minecraft.net/download/minecraft_server.jar

This will run minecraft in headless mode and with a limit on RAM.

java -Xmx1024M -Xms1024M -jar minecraft_server.jar nogui

This will create a backup of the minecraft world folder in a backup folder. You probably should work on this part.

rsync -a --delete --progress /path/to/minecraft/world "/path/to/minecraft/bak/world"`eval date

Well, hope this helps someone. Have a good day.

Rsync – Speed Limit – Trickle – Slow

Install rsync and trickle:

sudo apt-get install rsync
sudo apt-get install trickle

Now you can run rsync:
This will download at a limit of 80 KB/s from host:

rsync -auvPe "trickle -d 80 ssh" user@host:/src/ /dst/

Explanation of Commands:

-a, --archive               archive mode; equals -rlptgoD (no -H,-A,-X)
-u, --update                skip files that are newer on the receiver
-v, --verbose               increase verbosity
-P  --progress              show progress during transfer
-e, --rsh=COMMAND           specify the remote shell to use
trickle -d 80  = -d rate    Limit the download bandwidth consumption to rate KB/s.

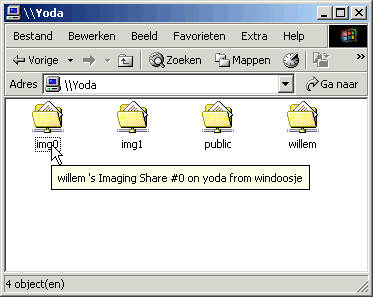
Ubuntu Samba – Read-Write-FSTAB-Cifs-Mount


This is my current setup for my two Ubuntu 10.10 (Maverick Meerkat) boxes. One shares a read/write folder to the other. This is my setup. I think the key to this is having the same username on both computers having access to the files.

You might have to run this on the the folder:
sudo chmod -R 777 /path/to/files
sudo chown -R usernameonbothcomputers:usernameonbothcomputers /path/to/files

I installed samba by doing: sudo apt-get install samba

/etc/samba/smb.conf : (on the computer serving the files)

[global]
	workgroup = WORKGROUP
	server string = %h server (Samba, Ubuntu)
	dns proxy = no
 
	interfaces = 127.0.0.0/8 eth0
	bind interfaces only = yes
 
	log file = /var/log/samba/log.%m
	max log size = 1000
	syslog = 0
 
	panic action = /usr/share/samba/panic-action %d
	encrypt passwords = true
	passdb backend = tdbsam
	obey pam restrictions = yes
	unix password sync = yes
	passwd program = /usr/bin/passwd %u
	passwd chat = *Enter\snew\s*\spassword:* %n\n *Retype\snew\s*\spassword:* %n\n *password\supdated\ssuccessfully* .
	pam password change = yes
 
	guest account = nobody
	invalid users = root
	usershare allow guests = yes
 
[MyFiles]
	path = /path/to/share
	writable = yes
	read only = no
	valid users = usernameonbothcomputers

sudo /etc/init.d/smbd reload

/etc/fstab : (on the computer accessing the files)

//SAMBASHAREsSERVERNAME/MyFiles /path/to/mount cifs users,,noatime,username=usernameonbothcomputers,password=theuserspassword 0 0

You should be able to run this to mount all things in your fstab:
sudo mount -a

SSH/SCP/SFTP I love them all.

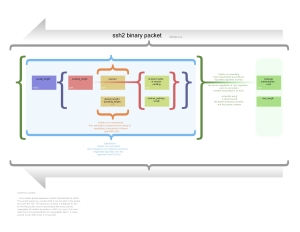
ssh_binary_packet_alt_sm.jpg
I pretty much use ssh for everything. I use it mostly to connect to my home/web/this server and use it as an interface. The best program to use alongside ssh is screen.

To install both ssh and screen, you may do this:

  1. sudo apt-get install ssh
  2. sudo apt-get install screen

If I were good with words, I would write a poem for ssh. But alas, I am not. So, you get the first page from the Wikipedia Entry.

Secure Shell or SSH is a network protocol that allows data to be exchanged over a secure channel between two computers. Encryption provides confidentiality and integrity of data. SSH uses public-key cryptography to authenticate the remote computer and allow the remote computer to authenticate the user, if necessary.

Here are a few of the best SSH/SCP commands EVER:

  1. ssh server.com
  1. scp server.com:./ /home/local/downloadhere/
    Popular/Best SSH/SCP/Clients (mostly for windows, because linux usually already has tools built in.):

  • WinSCP
  • Putty
  • gFTP
  • the normal commands that come with Linux(ssh, scp)